
Major Problems in Refrigerators
- Refrigerators are essential appliances in homes, and like any other device, they can encounter issues.
- Here are some common problems with refrigerators and possible solutions:
- Refrigerator not cooling:
- Refrigerator leaking water:
- Water dispenser not working:
- Constant running or cycling:
- Ice build-up inside the refrigerator:
- Refrigerator noise:
- Light not working:
- High electricity power consumption:

See Online the Parts of Refrigerator
Not Cooling Properly:
- Issue: The refrigerator fails to maintain the desired temperature.
- Solutions:
- Check if the thermostat is set to the correct temperature.
- Clean the condenser coils to improve heat exchange.
- Ensure proper ventilation around the refrigerator.
- Verify that the door seals are intact and sealing properly.
Excessive Frost Buildup in Freezer:
- Issue: Ice accumulates inside the freezer.
- Solutions:
- Check the door gaskets for any leaks and replace if necessary.
- Defrost the freezer regularly.
- Ensure that the freezer door is closing properly.
- Check the defrost timer, heater, and thermostat for malfunctions.
Water Leakage
- Issue: Water pooling inside or around the refrigerator.
- Solutions:
- Check the drain pan for cracks and replace if needed.
- Clear any blocked drain tubes.
- Inspect the water supply line and connections for leaks.
- Verify that the refrigerator is level to prevent water leakage.
Unusual Noises:
- Issue: Strange or loud sounds coming from the refrigerator.
- Possible Solutions:
- Ensure the refrigerator is level and on a stable surface.
- Check for any loose or vibrating parts.
- Clean the condenser coils to reduce strain on the compressor.
- Investigate if the fan or motor is causing the noise and replace it if necessary.
Ice Maker Not Working
- Issue: Ice maker not producing ice or producing poor-quality ice.
- Solutions:
- Check the water supply to the ice maker.
- Inspect the water inlet valve for any blockages.
- Clean the ice maker components regularly.
- Replace the ice maker if it is malfunctioning.
Refrigerator Running Too Frequently:
- Issue: The refrigerator runs constantly.
- Possible Solutions:
- Adjust the thermostat to a slightly higher temperature.
- Check for excessive food-blocking air vents.
- Clean the condenser coils for better heat dissipation.
Fridge Light Not Working:
-
- Issue: The interior light is not turning on.
- Solutions:
- Replace the light bulb with a new one.
- Check the door switch for any malfunction.
- Ensure the power supply to the refrigerator is stable.
Temperature Fluctuations:
- Issue: The temperature inside the refrigerator fluctuates.
- Solutions:
- Check for obstructions blocking air vents.
- Ensure that the refrigerator is not overloaded with food.
- Verify that the condenser fan is working properly.

Common Repairs and Replacement
- Depending on the issue, here are some common refrigerator repairs:
- Thermostat Replacement: If the refrigerator is not cooling properly, the thermostat might be faulty.
- Defrost Timer Replacement: For excessive frost buildup in the freezer, a malfunctioning defrost timer could be the cause.
- Door Seal Replacement: Leaking cold air from a damaged door seal can be fixed by replacing it.
- Fan or Motor Replacement: Unusual noises may indicate a problem with the fan or motor.
- Water Valve Replacement: If there’s a water leakage issue, a faulty water inlet valve could be the culprit.

Guidelines for Replacing Refrigerator Parts
- Replacing refrigerator parts may involve various components, and the specific steps can depend on the make and model of your refrigerator.
- Here’s a general guide on how to replace common refrigerator parts:
- Safety First:
- Ensure the refrigerator is unplugged or the power is turned off at the circuit breaker before starting any replacement.
- Identify the Faulty Part:
- Diagnose the problem and identify the faulty part. This may involve observing the symptoms, using a multimeter to test for continuity, or consulting the user manual for troubleshooting guidance.
- Gather Necessary Tools:
- Collect the tools needed for the replacement. Common tools include screwdrivers, pliers, wrenches, and a multimeter.
- Order Genuine Replacement Parts:
- Purchase genuine replacement parts recommended by the refrigerator manufacturer. You can find these parts through authorized dealers, online retailers, or directly from the manufacturer.
- Refer to the User Manual:
- Consult the refrigerator’s user manual for specific instructions on how to replace the identified part. The manual may provide diagrams, step-by-step instructions, and safety precautions.
Common Replacement Procedures:
- Depending on the part of the refrigerator, here are general steps for some common replacements:
- Thermostat:
- Locate the thermostat, often situated inside the refrigerator compartment.
- Remove the cover or panel to access the thermostat.
- Disconnect the wires and remove the old thermostat.
- Install the new thermostat, reconnect wires, and secure it in place.

- Defrost Timer:
- Locate the defrost timer, typically found near the temperature control panel.
- Unplug the refrigerator.
- Remove the old defrost timer and install the replacement, ensuring it’s set to the correct defrost cycle.
- Door Seal/Gasket:
- Peel back the old door gasket, starting from one corner.
- Clean the area where the gasket sits.
- Align the new gasket properly and press it into place.
- Fan or Motor:
- Access the fan or motor by removing the appropriate panels or covers.
- Disconnect the power supply and any attached wires.
- Unscrew or unclip the old fan or motor and replace it with the new one.
- Water Inlet Valve:
- Locate the water inlet valve usually at the back of the refrigerator.
- Turn off the water supply and disconnect the water line.
- Remove the old valve and install the replacement, reconnecting the water line.
Follow the Manufacturer’s Instructions:
-
- Adhere to the specific instructions provided by the manufacturer for the replacement of each part.
- Test the Refrigerator:
- After replacing the part, plug in the refrigerator and ensure that the new component is functioning correctly. Monitor the appliance for any unusual behavior.
- Dispose of Old Parts:
- Dispose of old, faulty parts according to local regulations.

Steps for Thermostat Replacement:
- Unplug the refrigerator from the electrical outlet or turn off the power at the circuit breaker to ensure safety during the replacement.
Steps for Thermostat Replacement:
- Locate the Thermostat:
- Refer to the refrigerator’s user manual to identify the thermostat’s location. Typically, it is situated in the fresh food compartment.
- Access the Thermostat:
- Remove any shelves, drawers, or covers that may be obstructing access to the thermostat.
- Disconnect Power to the Thermostat:
- Carefully disconnect the power supply to the thermostat. This may involve removing wire connectors or disconnecting the thermostat from the control board.
- Remove the Old Thermostat:
- Depending on the model, the thermostat may be secured with screws or clips. Remove the screws or release the clips to detach the thermostat from its housing.
- Note Wire Connections:
- Before disconnecting any wires, take note of their locations or take a picture for reference during installation. This will help ensure the correct reconnection of wires to the new thermostat.
- Disconnect Wires:
- Gently pull or unscrew the wires from the old thermostat. Exercise caution to avoid damaging the wires or connectors.
- Install the New Thermostat:
- Place the new thermostat in the same position as the old one. Secure it with screws or clips, following the reverse of the removal process.
- Reconnect Wires:
- Reconnect the wires to the corresponding terminals on the new thermostat. Ensure a snug and secure connection.

Wiring diagram for refrigerators in homes
- Reconnect the wires to the corresponding terminals on the new thermostat. Ensure a snug and secure connection.
- Reconnect Power:
- Reconnect the power supply to the thermostat. This may involve plugging in wire connectors or attaching the thermostat to the control board.
- Test the Thermostat:
- Plug the refrigerator back in or turn on the power at the circuit breaker. Set the thermostat to the desired temperature and monitor the appliance to ensure it reaches and maintains the selected temperature.
- Adjust the Temperature:
- Use a thermometer to check the actual temperature inside the refrigerator. Adjust the thermostat if needed to achieve the desired temperature.
- Replace Covers and Shelves:
- Once you are satisfied with the temperature, replace any covers, shelves, or drawers that were removed during the process.

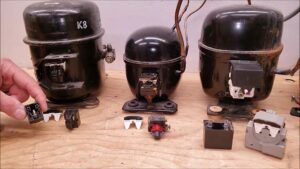
Replacement of Compressor
- Replacing a compressor in a refrigerator is a more complex task and often requires professional expertise due to the involvement of refrigerant handling. However, if you have experience with appliance repair and are confident in your skills, here is a general guide.
- Please note that this is a simplified overview, and it’s crucial to follow the specific instructions in your refrigerator’s manual or consult a professional technician for guidance.
- Compressors are sealed units that contain refrigerant. Handling refrigerants requires specific knowledge and equipment, and it may be regulated by environmental laws. If you’re not trained to handle refrigerants, it’s strongly advised to seek professional assistance.Unplug the refrigerator from the electrical outlet or turn off the power at the circuit breaker.
Procedure for Compressor Replacement:
- Determine the Issue:
- Confirm that the compressor is the source of the problem by troubleshooting and ruling out other possible causes.
- Check Warranty:
- If your refrigerator is still under warranty, contact the manufacturer or authorized service center for assistance.
- Gather Tools and Materials:
- Acquire the necessary tools, including screwdrivers, pliers, tubing cutter, and a manifold gauge set. You may also need a refrigerant recovery system if you’re handling refrigerant.
- Release Refrigerant (Professional Technician Required):
- If refrigerant handling is required, a licensed technician must recover the refrigerant according to regulations. This step should not be attempted by individuals without the necessary certification.
- Disconnect Power and Components:
- Remove any panels, covers, or components that obstruct access to the compressor.
- Disconnect the electrical connections, including the start relay and overload protector.
- Disconnect Refrigerant Lines:
- Use a tubing cutter to carefully cut the refrigerant lines connected to the compressor. Ensure that you have proper tools to cap or seal the lines temporarily.
- Remove Compressor:
- Unscrew and remove the mounting bolts securing the compressor to the refrigerator.
- Carefully lift out the old compressor and dispose of it properly.
- Install the New Compressor:
- Place the new compressor in the same position as the old one.
- Secure the compressor in place by tightening the mounting bolts.
- Connect Refrigerant Lines:
- Use proper fittings to connect the refrigerant lines to the new compressor. Ensure that the connections are secure.
- Electrical Connections:
- Reconnect the electrical components, including the start relay and overload protector.
- Vacuum and Charge Refrigerant (Professional Technician Required):
- A licensed technician must vacuum and charge the system with the appropriate amount of refrigerant. This process requires specialized equipment.
- Test the Refrigerator:
- Plug in the refrigerator and turn on the power. Monitor the appliance to ensure the compressor is functioning correctly, and the refrigerator is cooling properly.
Conclusion
- If you encounter persistent issues or are unsure about the cause of the problem, it’s recommended to consult the refrigerator’s user manual or seek professional assistance from a technician
- Refer professional help from an appliance technician.
- They have the expertise to handle repairs and replacements safely and effectively.
- Compressor replacement involves intricate processes and compliance with safety and environmental regulations.